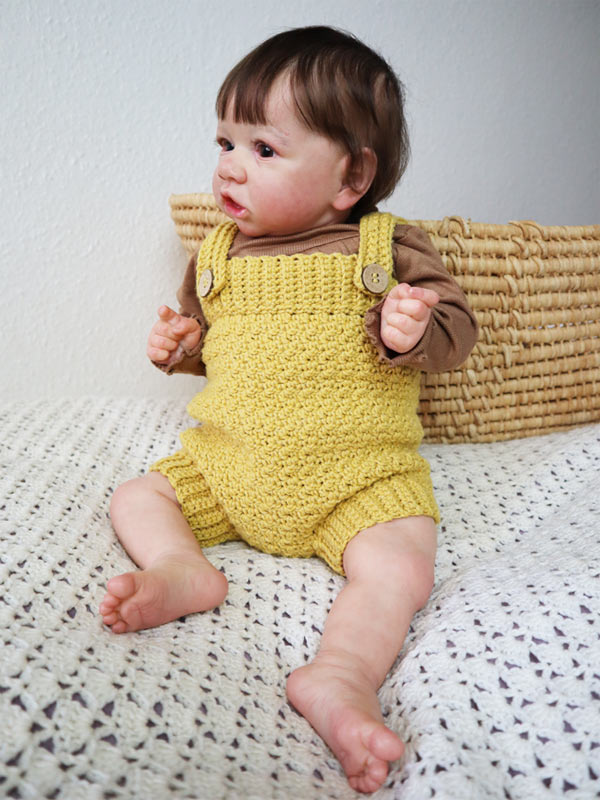
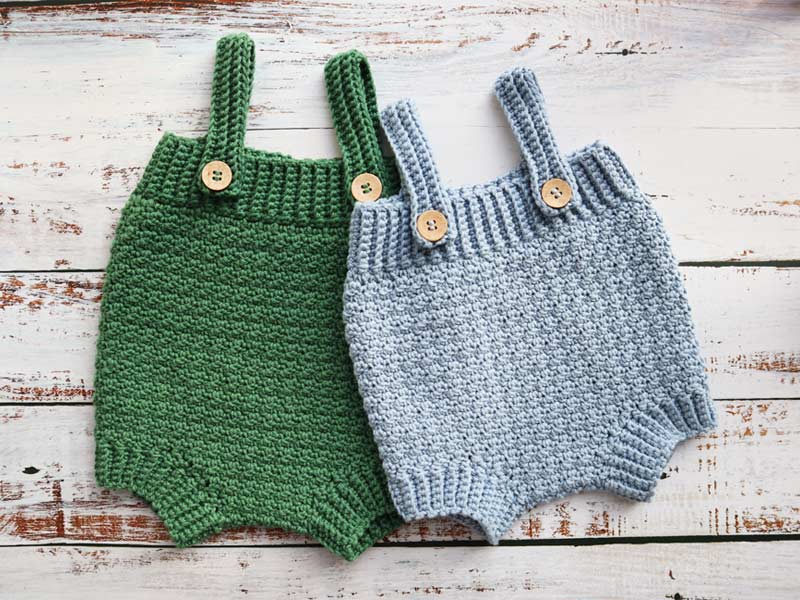
Lemon Peel Crochet Baby Romper.
I am very exited to present the pattern for this cute, soft and comfortable baby romper. It is super practical and comfortable for a small child to wear, and it´s so nice to have the legs free to really kick and bounce 🙂
This romper is crocheted in Drops Cotton Merino, which is a wonderfully soft yarn, consisting of exclusive Indian cotton, and delicious soft merino wool.
This pattern has been tested and tried on real children in all the available sizes. The size can vary depending on the gauge. You may need to change the crochet hook size to achieve the same size. It is important to use the same yarn, as indicated in the pattern, to get the same result and the right size.
You can find the free pattern below in size 0-2 months. If you want to make the Crochet Baby Romper in other sizes, you can buy the ad-free PDF pattern in sizes 2-12 months right here: CROCHET LEMON PEEL BABY ROMPER PATTERN
Materials
- Drops Cotton Merino 100 gram.
- 4 mm crochet hook
- 3,5 mm crochet hook
- Stitch markers
- 2 buttons 20 mm.
- Scissors
- Darning needle
Gauge
16 ST and 16,5 Rows = 10 x 10 cm. (Lemon peel stitch)
8 ST = 4 cm. 19 Rows = 10 cm. (Ribbing)
Abbreviations
- CH – Chains
- ST – Stitch
- SL ST- Slip Stitch
- SC – Single Crochet
- DC – Double Crochet
- HDC DEC – Half Double Crochet Decrease (Half Double crochet 2 together)
Pattern Notes
- Size: 0-2 mos
- Measurements: Width: 25,5. Full length: 33 cm. S
- Skill level: Intermediate
- Terminology: The Pattern is written in US crochet terms
Instructions Size 2 Months
CH 78 Join the row my making SL ST into the first CH.
Round 1. SC in first ST. DC in next ST. *SC in next ST. DC in next ST*. Repeat from *-*around. The last ST of the row should be a DC. (78 ST.) SL ST in first ST and tur your work.
Round 2-22. Repeat round 1. (78 ST)
The Crotch
You now need to shape the crotch of your baby Romper. Start from the back side.
Use your stitch markers to mark 28 ST on the mid of the back side, by counting 14 ST from the middle to one side, and 14 ST to the other side from mid back.
Row 23. Attach the yarn where you have your stitch marker. Continue the Stitch Pattern from before (You must work in the opposite direction than the previous round.) CH 1 and make a HDC DEC. Crochet next 24 ST. Make a HDC DEC (26 ST) CH 1 and turn.
Row 24. Make a HDC DEC. Crochet next 22 ST. Make a HDC DEC. (24 ST) CH 1 and turn.
Row 25. Make a HDC DEC. Crochet next 20 ST. Make a HDC DEC. (22 ST) CH 1 and turn.
Row 26-30. Continue in this way, making a HDC DEC in the first and the last ST of each row. You will have 12 ST left in last row. In total you will have 16 HDC DEC over 8 rows. (12 ST )Cut and fasten off your yarn.
Front side of crotch
You will now shape the front side of the crotch.
Use your stitch markers to mark 20 ST on the mid front side. Count 16 ST from the back crotch piece on one side and the other. Place your markers.
Row 23. Attach the yarn where you have your stitch marker. Continue the Stitch Pattern from before (You must work in the opposite direction than the previous round.) CH 1 and make a HDC DEC. Crochet next 16 ST. Make a HDC DEC (18 ST) CH 1 and turn.
Row 24. Make a HDC DEC. Crochet next 14 ST. Make a HDC DEC. (16 ST) CH 1 and turn.
Row 25-26 Continue in this way, making a HDC DEC in the first and the last ST of each row. You will have 12 ST left in last row. In total you will have 8 HDC DEC over 4 rows. (12 ST) CH 1 and turn.
Row 27-30. Crochet in every ST across. (12 ST) Cut and fasten off your yarn.
Sew the front and back side of the crotch together using the mattress stitch.
Ribbing around legs
You will now make the ribbing to attach to the two leg holes. Use your 3,5 mm crochet hook and chain 7.
Row 1. SC in the 2nd CH from the hook and in next 5 CH. (6 SC) CH 1 and turn your work.
From now on work in back loops only.
Row 2. SC in every ST across. (6 SC) CH 1 and turn.
Row 3-40. Repeat row 2.
Crochet the edges of the ribbing together with SL ST.
Repeat this process to make the ribbing for the other leg.
Insert the ribbing into the leg hole from the wrong side of the Bloomers. Make sure that the seam is laying precisely by the seam of the crotch.
Attach the ribbing to the leg hole, by sewing all around the edge using the mattress stitch. Cut and fasten off your yarn.
Waistband and Straps
You will now make the ribbing in the waist and the straps of your romper. For the Ribbing you will be working in back loops only, this applies for every row.
Attach the yarn exactly in the mid bag of the lining. CH 9.
Row 1. SC in second CH from the hook and next 7 CH (8 SC) Attach the first row of your ribbing to the lining by making a SL ST into the next 2 ST of the lining. Turn your work
Row 2. SC In next 8 ST (Work in the back loops only) (8 SC). CH 1 and turn your work.
Row 3. SC in next 8 ST. Attach the row to the lining by making a SL ST into the next 2 ST of the lining. Turn your work
Row 4-6. Repeat row 2 and 3.
Row 7. CH 37. SC in 2nd CH from the hook and next 43 ST. Attach the row to the lining by making a SL ST into the next 2 ST of the lining. (44 ST) Turn your work.
Row 8. SC in next 44 ST (44 SC). CH 1 and turn your work.
Row 9. SC in first 2 ST. CH 2. Skip 2 ST(This will create a buttonhole). SC in next 40 ST. Attach the row to the lining by making a SL ST into the next 2 ST of the lining. (44 ST) Turn your work.
Row 10. SC in next 44 ST (44 SC). CH 1 and turn your work.
Row 11. SC in next 44 ST. (44 ST) Attach the row to the lining by making a SL ST into the next 2 ST of the lining.(44 ST)Turn your work.
Row 12-68. Repeat rows 2 and 3. (8 SC)
Row 69-73. You will now make the other strap. In the same way that you did the first one. Repeat rows 7-11. (44 ST)
Row 74-79. Repeat Rows 2 and 3 (8 SC) SL ST the edges of the ribbing together. Cut and fasten off your yarn.
Sew in all the yarn ends, and sew the two buttons on to the front side of the romper.
Watch the easy to follow Video Tutorial for this pattern right here:
Copyright
This crochet pattern and all the related images belong to Adorecrea.com. Do not modify, copy, sell or share this pattern as your own. For additional information please read the TERMS OF USE page.
You are welcome to make and sell as many crochet Baby Rompers made from this pattern as you like. But make sure to link to Adorecrea.com, when you post pictures online of the items that you make from this pattern.
Thank you! And happy crocheting 🙂

This blogpost contains affiliate links.

25 comments
[…] original free pattern on adorencrea.com, the photos […]
[…] Get Pattern […]
I am slightly confused by the instructions on the beginning of the back crouch. You mentioned marking 14 sts on the left of the seam and to the right of the seam making 28 sts. The next step is to make a HDC Inc on the first and last stich. My confusion comes in at the sts count. It says after the increase there should be 26 sts. If you increase by two after 28 sts it would be 30 sts in total. Do you mean HDC decrease there as well? Thank you so much, I just want to be sure I have this correct!
You will use 2 stitches in the start and end of each row to make one increase 🙂
Thank you for the adorable pattern. I am making it now. When you say height is 33 cm, does that include the straps? What should the height be from the deepest crotch to the top of the waistband? I was on with the swatch and gauge, but I do not think I have enough height. Please help. Thank you.
Dear Tina.
Thank You for your comment 🙂
The romper is measured from shoulder to crotch, so it is with the strap buttoned. It has been tested on babies in the age group. But babies come in many different lengths, so if you think it will be too short, then I would recommend you to make the straps longer by making more stitches in the straps. Have a nice day 🙂
Thanks for the pattern! (And the video was helpful too!)
Thank You. That is very kind of you 🙂
Do you use just one skein of yarn?
I use 2 skeins of 50 gram
I am wanting to make this to go with a baby blanket I made for a friend. I was wondering what weight of yarn you used. I used an acrylic yarn that was medium (4) for the blanket and was hoping to use the same one for this as well. Would it work?
The size of the romper might end up being different in size, when using some different yarn. But it might work. Here is the information about the yarn that I used: Yarn Weight: 3 or Light / DK / Worsted / 8 ply (recommended needle size: US 6 or 4 mm)
Weight / Yardage per Ball: 1.8 oz = approx 120 yards (50 g = approx 110 m)
Which needle do I start with to make the body
You will start with the 4.mm. crochet hook and use the 3.5 mm. for the ribbing.
I don’t understand your gauge
I am sorry to that. Are you using the same yarn. The yarn can really make a huge difference.
[…] Bring comfort to your little one with this crochet lemon peel baby romper! This soft and easy-to-wear romper is perfect for babies, allowing their legs to kick and bounce freely. With step-by-step instructions, you’ll be able to create a cute and elegant design that will make everyone smile. You’ll need drops of cotton merino yarn, 4mm & 3.5mm crochet hooks, stitch markers, 20 mm buttons, scissors, and a darning needle. Let’s get started on the best addition to your baby’s wardrobe! adorecrea […]
I see what Caitlin is saying. Do you mean to say decrease?
I see what Caitlin is saying. Do you mean to say decrease? And what crochaet stitch do you mean at the ens of the front crotch?
[…] original free pattern on adorencrea.com, the photos […]
are you chaining one at the start of each row?
Yes 🙂
In row 23 if crotch, afterthe hdc dec, it says crochet next 24 sets. Umm… crochet which stitch??
The same stitch pattern that you have been using all along.
[…] Click Here […]